These step-by-step instructions are designed for University of Maine System (UMS) staff to use in conjunction with the Cross-linking course instructions, available here. For a step-by-step video of these instructions, click here (External Site).
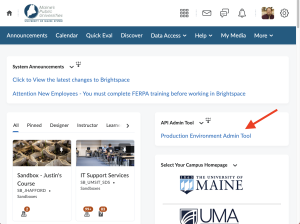
- Access UMS Brightspace‘s Homepage (External Site).
- Locate the “API Admin Tool” Widget box (top right of homepage).
- Select “Production Environment Admin Tool.”

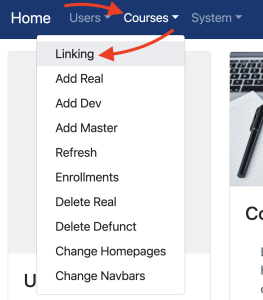
- Select “Courses” and then “Linking” from the Admin tool’s menu bar at the top of the page.

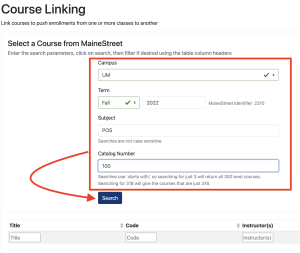
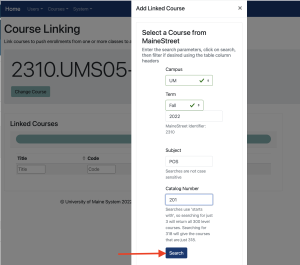
- Enter the search parameters for the first course, click on search, then filter if desired using the table column headers.
- After you have entered the information select “Search.”

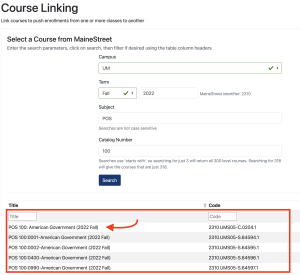
- Your search results will display at the bottom of this search page.
- Select the course you wish to link by clicking on the “Title of the Course” you require in the search results.

- Select “Add” (Ensure pop-up windows are not disabled).

- Enter the search parameters for the next course you wish to search for to link to the first course.
- After you have entered the query select “Search.”

- Select the desired course to link by clicking on the “Title of the Course” you require in the search results.
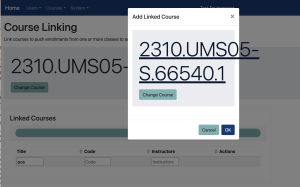
- You will be prompted to “Add Linked Course” and will select “OK” to approve the linking, or “Change” to make any corrections.

- If you need to link more courses to the initial two follow repeat steps 9 thru 13.

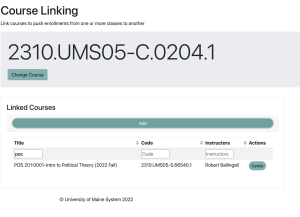
- If an error was made you may use the “delete” action to remove a linked courses.
- The course code of the newly linked courses will display at the top of the screen and the process is complete.